Thursday, January 13, 2011

Rammed earth outdoor shower


After the hand-thrown walls, earth plasters, and soil-cement floors it was finally time to get going with rammed earth. We thought a few low walls for an outdoor shower would be a good place to start. Six feet high, eight inches thick and no roof load, but exposed to all the Hana rain and to the shower water would be a good introduction to how well rammed earth could work in this climate. The backside of the wall serves as a landscape wall for the front door to the main pavilion.

We poured concrete footings and then set short section wall forms much like we did years ago on the mainland. We only had a small 13 cfm air compressor that would barely power a Jet 2-T rammer, so most of the wall was rammed by hand. Evan and Dan helped with the first corner, then Cindy's brother Alan and his kids came for a week to help on the shower wall and to plant bamboo. Khyber and Taj were here as well, so it was a family wall raising. It only took a few days.

We were trying to arrive at a good mix design for rammed earth that wouldn't require import from the other side of the island. The soil on site has no plasticity, being all volcanic in origin and not old in geologic terms, but it is expansive and will crack if not modified with aggregate. We added about 40% coarse red cinders that are available here in Hana and 7% Hawaiian cement. Getting the correct water content was also tricky. We had a tendency to overwater the mix and then ramming was a little spongy. We only had four wall sections total, but felt pretty good about how things turned out in the end.

The walls have now been exposed to seventy inches of annual rainfall for eight years and the surfaces are as durable as the day we stripped the forms. Mosses and lichens have colonized the face; blue ginger and yellow alamanda grow against them. Ferns grow in the joint between the base of the wall and the shower floor.

The shower walls gave us all the confidence we needed to move into the first of the rammed earth pavilions, which I'll describe in upcoming posts.


Thursday, January 6, 2011

Finishing the first pavilion


We worked quickly to finish the main pavilion, at least to a point where we could move in and quit paying nightly rentals. As I remember, it was about six weeks from the day the containers were off-loaded to the day we moved in with doors and windows, a working stove, frig, shower, toilet, and water heater. We had help from nieces, nephews, friends, children, and friends of children. It was like a barn raising island style. We had fish most nights and made it to the beach every day after work.

The main elements of this first building were: slab on grade foundation and floor, steel pipe roof framing with corrugated metal roof cover, hand-thrown earth walls, large sliding doors so the walls would open up, and a few interior partitions of earth plaster on foam cores. We had cut all the pieces for cabinets and wooden doors and loaded them in the container before we left, so assembly was fast on site. All the furniture and appliances were in the containers, along with dishes, bedding, towels and clothes. This was the challenge I'd set: to pack the containers with all the building materials, plumbing and electrical rough and finish, plus furnishings we'd need to build a house and be able to call it a home in a short period of time. Although we found a lot of room for improvement, I think we proved the concept - that a shipping container can be loaded in such a way that, with a few skills, the things in it can be turned into healthy shelter.

I've put together a few photos for this post showing the first pavilion finished. There were other components of the construction I haven't covered yet, such as the soil-cement floors and the pre-cast earth pavers, but that is because I think they are better illustrated with photos taken during work on the other buildings. In the next couple of posts I want to talk about the outdoor spaces and how getting started on the landscaping was just as big a part of moving onto the land as was the building.

In the photos you can see the way building one looked by itself, plus a shot of the bathroom with Kusumi's lime and earth plaster and the kitchen with his cement and earth plaster.


Tuesday, January 4, 2011

Earth plaster with Akira Kusumi


One spring in the late 1990's, we were invited to Japan to conduct a workshop in rammed earth. At the workshop we met Japan's most renowned and respected plasterer, Akira Kusumi. Among his other work, Kusumi is responsible for the periodic re-plastering of the Imperial Temple. All traditional plaster in Japan is clay-based. We became friends at the workshop, traveled to Kyoto for another visit together, and then I invited Kusumi to Napa to conduct a plaster training for our crew.

When it came time to develop the earth plaster formulas for the Shipwreck experimental station, we of course asked Kusumi to come and help us. Not only did he bring his expertise, but two boxes of Japanese plastering tools as gifts. We had three different soils, a black, brown, and red: a yellow sand, a gray sand, Hawaiian cement, and hydrated lime. Kusimi was looking for the right combination of gritty and sticky. He'd try a certain proportion of soil and sand and test it on his hawk for texture until it had the feel he wanted.

He actually used several different formulas throughout the house. For base coats on the interior walls he'd use copious amounts of long-chopped straw, and low-cement contents. For finish coats we used less straw, chopped finer, and lime rather than cement. Lime gives you more time to work the plaster smooth. Cement plaster is harder and more resistant, but also more difficult to work, especially for amateurs, which we certainly were. For the entry he used traditional Japanese plaster - pure earth and chopped straw with no cement or lime. With no stabilizer, you can come back the following day and steel trowel a final finish, tightening the surface and working out the small shrinkage checking.

Kusumi and Masako were here for a week. We worked pretty much all the time, and finished all the interior partition walls as well as finish coats over the hand-thrown walls in the bathroom and the kitchen. Kusimi's mastery of his craft was remarkable to observe. He could cover a wall in one-tenth the time it took either me or Khyber, and where our work ended up full of trowel marks and cat faces, his was smooth and flat. I have all of the formulas recorded in the formula log. Let me know if you're interested.


Wednesday, December 29, 2010

Hand-thrown earth walls


Before we came to Hana, we knew it rained 80 or 90 inches a year, but we didn't know how often and for how long it rained on any given day. Having worked in Nicaragua, Brazil, and the cloud forests of Veracruz Mexico (not to mention northern California in the winter) we knew building rammed earth in the rainy season was challenging. Soil gets too wet to compact, tractors get stuck in the mud, and in general, wall quality suffers.

For these reasons, we made the decision to build at least the first of our structures under cover of roof. And since you can't ram a wall with rafters and sheeting overhead, we decided to use the hand-thrown method. Actually, I don't know of any other builders who do hand-thrown, but we've been experimenting with the technique off and on for a dozen years. Hand-thrown is a closet cousin of pise, our high-pressure air delivery method of building structural stabilized earth walls. Both techniques utilize a single sided form, a wet mixture impacted against the form and then shaved off to the desired wall thickness. In production pise, volumetric mixing machines and huge air compressors blast stabilized earth at a rate of 8 to 10 cubic yards an hour. We use the technique to build large structures fast. Hand-thrown, on the other hand, is slow, but effective; good for the pace of island building, and with cement stabilization, very resistant to weathering as we have observed over the last seven or eight years. (In fact, I was pressure-washing the house just today to clean off the salty residue that blows in off the ocean and the walls are like basalt.)

We built the walls in panels, corners with three-foot wings, and three-foot in fill panels between the big window walls. Each panel was reinforced with a grid of #4's at 12", with the bars threaded through holes drilled in the galvanized steel support posts. The wall formula was a combination of site soil, mined during the first phase of the excavation, sand and gravel imported from the isthmus near Kahului, and 10% Hawaiian Cement (imported from China). We measured proportions with five-gallon buckets (one sack of cement fills two buckets0, mixed with an Imer three cubic-foot drum mixer (brought over in the shipping container) and delivered in a wheelbarrow. The corners were about one cubic yard, the infill panels about a half yard.

Building a hand-thrown wall is pretty much like the name implies. Wearing gloves, grab a handful of the mix (it should be the consistency of paste) and throw it against the form. Start at the bottom corner and toss one handful after another against the form, working your way first across the bottom the full width of the panel. Keep throwing handfuls working across the panel, building both out to the finished thickness and up against the form. As you build the wall upward, keep the slope of the working surface at about 45 degrees. If the mix is the proper consistency, each handful will bond to the previous and the mud will quickly take an initial set. If the mix is too wet, too low in clay, or you manage to work too fast, you'll get some slumping. Try to avoid slumping.

After you've built the wall out to just beyond the finished thickness and up to about two feet in height, you'll want to shave back the excess to create a plumb, flat wall surface. We use a gunite finishers tool called a rod (or knife), but you can also use a 1x6 with a bevelled edge or a 24" concrete finishers trowel. The longer the cutting tool, the straighter the wall will be. Keep in mind, however, that the cut side of a hand-thrown wall is by nature an imprecise finish. Getting your timing right on cutting the wall will take a little practice.

Once the first "lift" is shaved, go back to throwing. When we start moving up the wall, we use plasterer's mortar tables to work off. Shovel the mud out of the wheelbarrow onto the table. It's much less work to grab a handful off of the table than out of the wheelbarrow. Some of us even prefer the two-hand toss, so you can get more material onto the wall at one time. You don't have to throw hard, just enough to get a good bond and embedment to the steel. Your arms get tired by the end of a panel. We tried to build one corner or two panels a day. Evan was here at the start, then Lucky (a local) did rest of the mixing, Khyber did most of the throwing, all of the cutting, and I helped out a little.

We used the hand-thrown method on only the first of the three main pavilions, switching to traditional rammed earth for the other two. The advantages to hand-thrown are that (1) you can work under a roof, (2) you only need one form face rather than two and a whole lot less bracing, and (3) the wall can be much thinner because the roof is supported on the embedded posts rather than on the wall itself. The disadvantages are that you'll need a higher cement ratio to make up for the lower compaction factor and of course you need to supply and set the posts.

The beauty of the shipwreck research center is that there can be no failures. Everything is a study in island appropriate methods and materials. We think up a technique or a combination of building materials, design a project to implement them, build it, evaluate the process, then watch it respond to the elements.

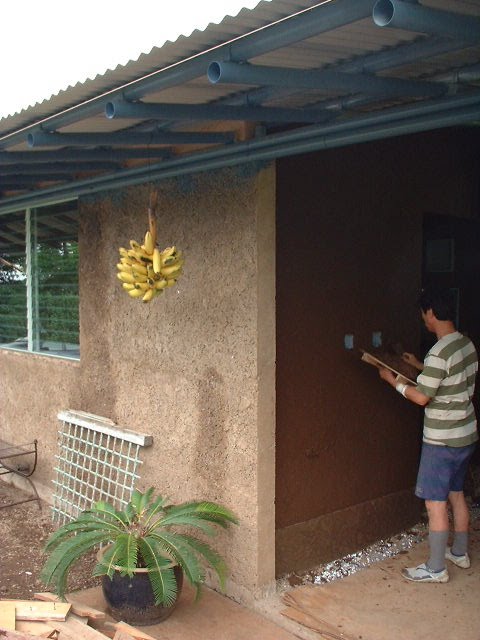
The photos in this post illustrate the building of the hand-thrown walls, plus I've included a photo of shooting pise on the mainland.


Saturday, December 25, 2010

Framing with poles


One of the most challenging strategies to our shipwreck building research was to develop a roofing system that could either grow on the island or be simple, lightweight, and easy to import. Our first thought, of course, was bamboo with thatch. Bamboo is easy to grow in the tropics and sub tropics, is now being grown commercially on Maui and the big island, and Bamboo Technologies, headquartered on Maui, has won code approval for one species, bambusa stenostachya, grown in Southeast Asia.

Bamboo for construction has gained a lot of momentum in the past decade, thanks in large part to the work of architect and builder Simon Velez. I was pretty certain bamboo poles for roof structure, in combination with rammed earth walls, would be two key components on our ultimate building materials pallet.

Bamboo Technologies produces pre-cut kit homes using plywood and bamboo panels for both walls and roofs. I was hoping to get away from the plywood and use braced poles for the roof framing with a separate, non-structural roof cover. I still wasn't sure what the roof cover would be. I didn't think thatch would have the durability we were after; plus it's a little too much of a stretch even for my unconventional approach. Clearly we had some things to learn and experiments to conduct before we were ready for bamboo roofing.

As a starter, and to make obtaining our permit a little easier, we decided to introduce the building department to stabilized earth first and move into bamboo later. But, wanting to get some experience working with round structural members rather than sawn wood, we decided to use galvanized steel poles. You can buy them in bulk from fencing supply companies, and they are relatively inexpensive. We designed the roof with trusses and bolted connections similar to those we had seen in Simon Velez's book. It's all very light-weight and can go up quickly.

We had cut and drilled the members for the trusses before loading them in the shipping container. The first of our pavilions was going to have 6" thick walls of hand-thrown earth rather than traditional rammed earth, so we set two rows of poles in the foundation as we were pouring the slab to receive the trusses. If we had built 12" thick rammed earth walls, we could have skipped the poles, but since we didn't know how often it rained, we thought it would be best if we put a roof up quickly and then worked under the roof to build the earth walls. As you'll see in later posts, we did switch to traditional rammed earth when we found out that most of the time the rains are short and sweet.

As you can see in the photos included with this post, the roof framing did go up quickly, thanks to all the help from our friends who flew over the join the first of many work parties.


Wednesday, December 22, 2010

Getting started on site


Just as soon as we had the containers on the ground, Bullets and his dozer-driving partner Brandon graded the pad and dug the footings for the first structure - a central kitchen/dining/living pavilion. Since the building pads were on a slight slope, we were able to accumulate enough soil to use in a wall formulation comprised of 50% site soil, 25% imported gravel and 25% imported sand. I"ll cover the wall building for the first pavilion in a later post.

We had packed the container with 2x12 form boards (that we would later use for the rammed earth wall forms) and with the reinforcing steel for the footings and slab. The steps after cutting the pad were (1) setting the perimeter form, (2) tying the reinforcing and (3) installing the electrical service panel and conduits. The electrical supply came up from a temporary pole we had set along the access road. We poured the footings and slab two days after off-loading the containers. I had intended to color the slabs with a powdered dye dusted onto the fresh concrete and bull-floated in, but I hadn't counted on the long haul from the batch plant. When the mud arrived on the job it was just too close to set up that we couldn't get the dye to work it. In retrospect, we would have been better off bringing bulk sand and gravel onto the site and mixing our own concrete (which we did on subsequent pours).

The photos at the end of this post show one fun shot that illustrates the containers in relation to the first pavilion, the others are of the form boards and reinforcing steel, the service panel and conduits, and pouring the footings and slab. The photo at the top of the post is of Hamoa Beach.


Sunday, December 19, 2010

Packing for the Trip


The adventure on Maui wasn't really like being shipwrecked, because we had plenty of time to plan what to take. Crusoe and the Robinsons had to forage from the wrecks for their building materials. We had months to complete drawings and compile extensive lists of what we wanted in the containers. The challenge we set for ourselves was to see if we could pack every single item we would need to build the first house and furnish it. We included a solar water heater, stove, refrigerator and even our old Kubota tractor. We were trying to prove that small shipping containers could be packed and converted into disaster relief housing. As we found out, one container would have worked, but the second got us started on the elaboration of our concept to include more local resources. Once we sourced materials available within our immediate vicinity the construction expanded to a laundry room, shop and several other auxiliary buildings adding, those elements to our building palette.

In January of 2002 the experiment began. We trucked the first two containers to the port of Oakland, then flew over to Maui to meet them. When we first purchased the land for our project, it was so overgrown with cane grass and wild guava trees you couldn't see the ocean, but we'd cleared a quarter of an acre where the first house was going to go and where the containers would be off-loaded. The idea was the containers, once emptied, would serve as temporary shelter and job trailer.

Getting the containers from the port in Kahului out to the building site was a challenge. For one, the road is narrow and winding. The bridges are one-lane and packed with a constant flow of tourists circumnavigating the island. The second, they were too heavy for a single forklift to off load them. The first problem we solved by hiring local hauler Lloyd Redo who makes the trip before dawn. The second problem we solved with 2 forklifts balancing each container delicately as they danced them into place.

Once the containers were on the ground, lined up precisely with mountain and ocean we were ready to start. The photos in this post show the containers loaded on the truck in Napa, being off-loaded, and our new friend Bullets, our backhoe driver. The first photo is a view of the island Alau wearing a rainbow.